


Looking at Light: The Anatomy of a Shadow
by Taylor Slattery | September 17, 2020
Today, we’ll take a look at the basic structure of a shadow. We’ll use four basic forms to demonstrate the different elements of light that are used to create the illusion of form. The order in which the elements are added is a procedural approach you can replicate in your own work. While the forms we see in nature might appear to be significantly more complex than the forms we’ll explore today, in their most simplified form, they can be viewed as some sort of combination of these 4 shapes.
These four forms provide the basic framework for how to approach just about any 3-dimensional form. Whether you’re drawing the human figure or designing futuristic vehicles, the underlying principles of light will work in the same way as they do for these, which makes them a great place to start.

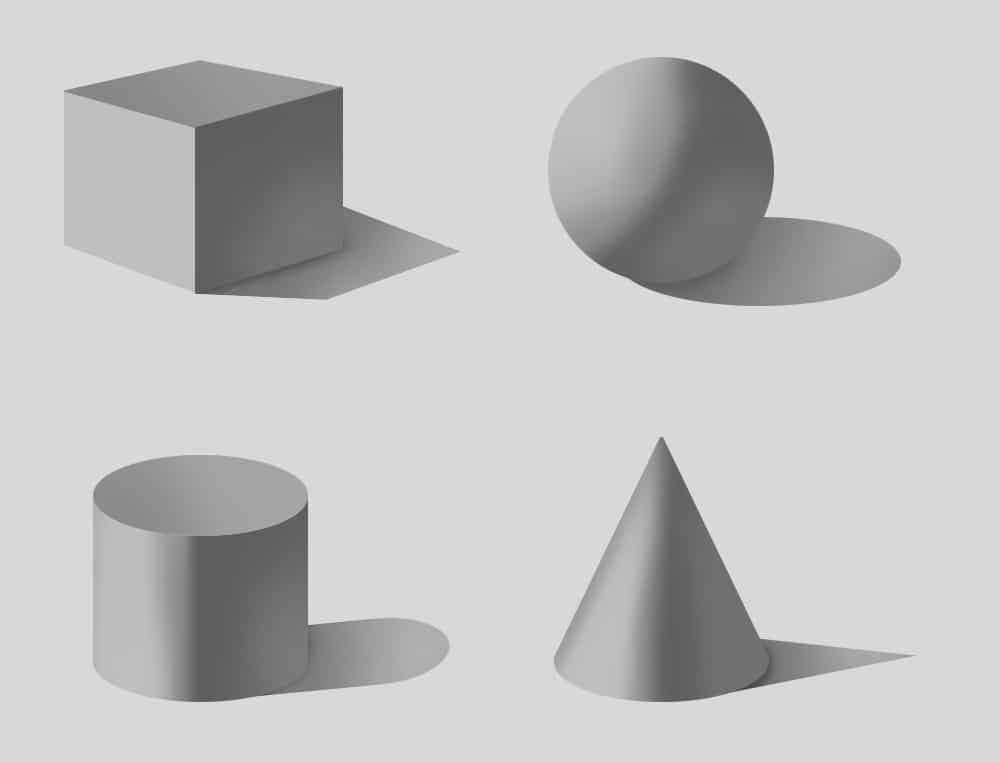
Here we have our 4 basic shapes. They’ve been given a basic value, which we will refer to as their local color, and they’ve been set against a neutral grey background so we can better observe the changes made to their value structure. Let’s begin by first separating the forms into two sides, one for light and one for shadow.
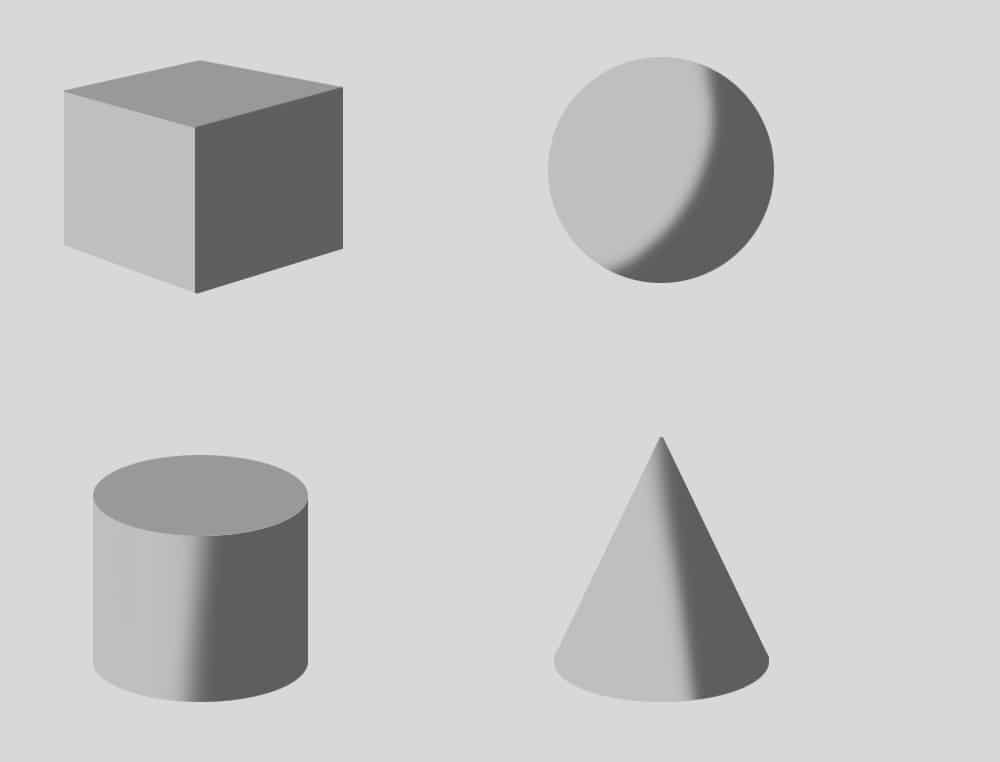
With the addition of the shadow side, we’ve landed upon our first basic element of shadow. The line by which an object’s light and shadow sides are separated is referred to as its terminator. Notice how the terminator of the cube is much harder when compared to the 3 other forms. Here we can see that with this minimal amount of information, we’re able to see the beginnings of 3-dimensional form. In this state, the cylinder and cube have a much stronger read than the sphere and cone. This is due to their top planes, which are also a part of their light side, and help us to understand their form. Because the top planes are darker than the sides, we can tell that the light is facing our objects from a lower angle.
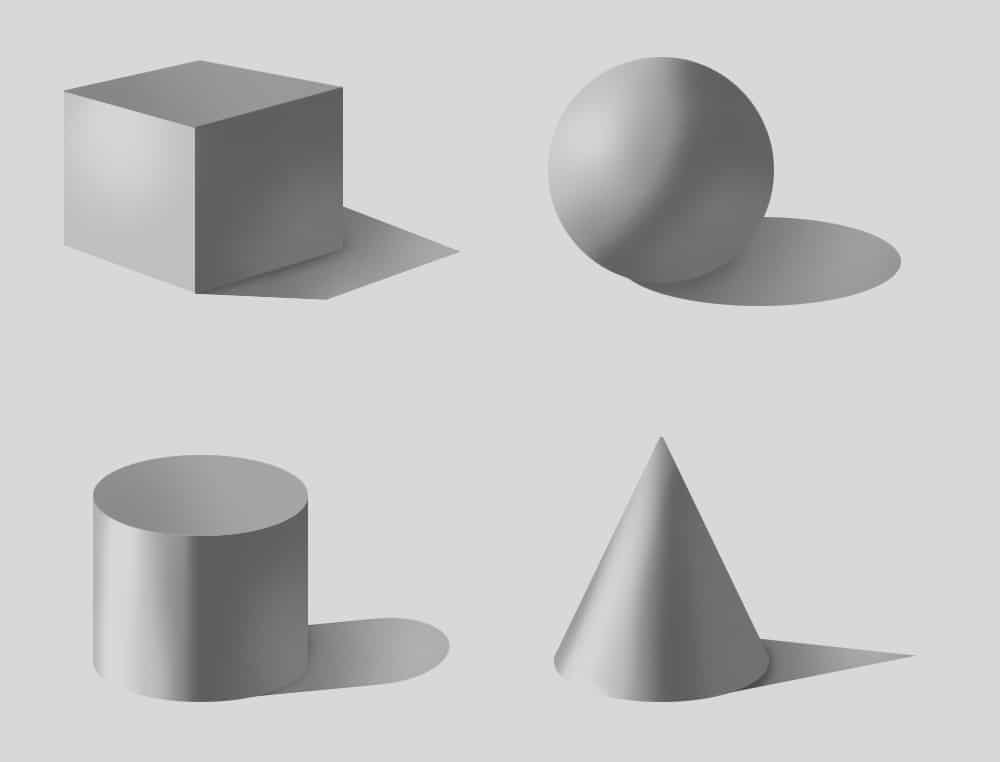
It’s important to note that there are some very strict rules for the separation of light and shadow. For our renderings to adhere to the principles of light, the darkest value of the light side must still be lighter than the lightest value of the dark side. Next, let’s add some mid-tones.
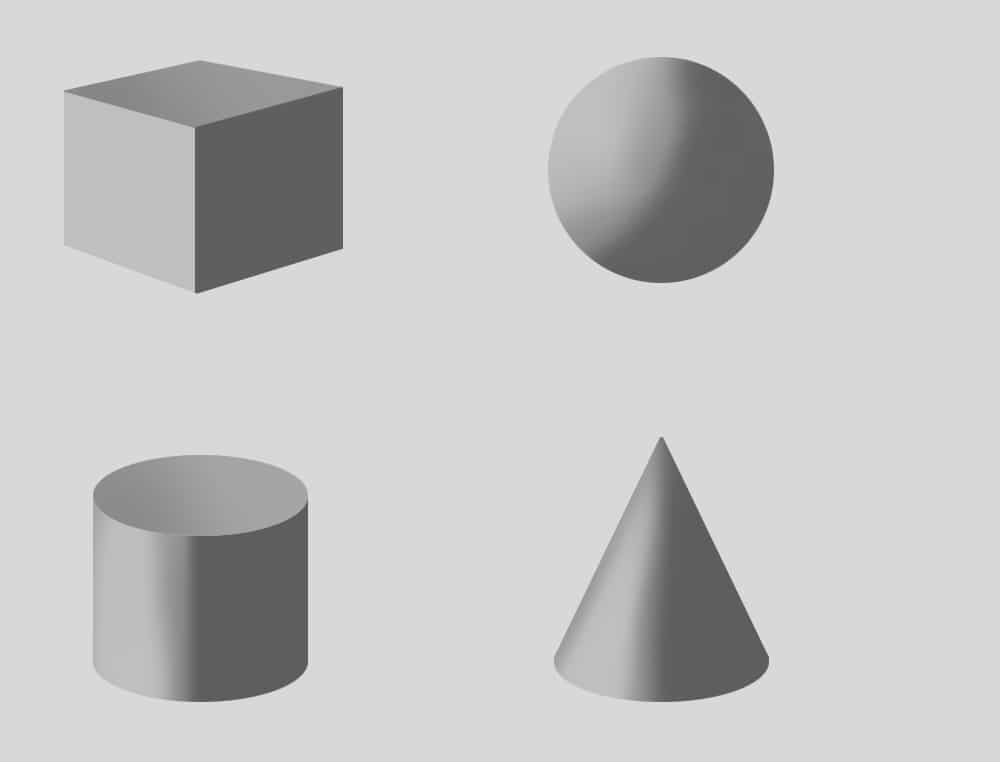
We’ve added some darker values to our light side to help further define the form. As previously mentioned, because these mid-tones are found on the light side, they must be of a lighter value than our shadow side. We’ll now add a cast shadow.
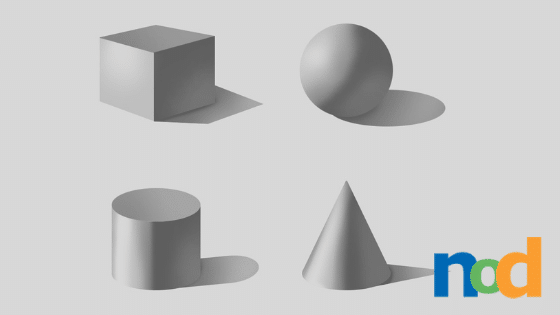
This helps us to better understand the location of our light source as well as to hint at the sides of our forms we can’t see. Notice how the shadows all stem from the terminator, the line that separates light from shadow. If we follow this line to the backside of our forms, we can better imagine their 3-dimensionality. Next, we’ll add some reflected light and occlusion shadows.
The occlusion shadow is found where the object touches the ground plane. This area is the darkest part of the shadow because it can’t be reached by reflected light. Notice how the reflected light affects both the cast shadow as well as the shadow side of our forms. Imagine the light first bouncing onto the ground plane, causing our cast shadow to lose some of its darkness. The light then travels upwards, connecting with our forms, and lightening the value of their shadow sides.
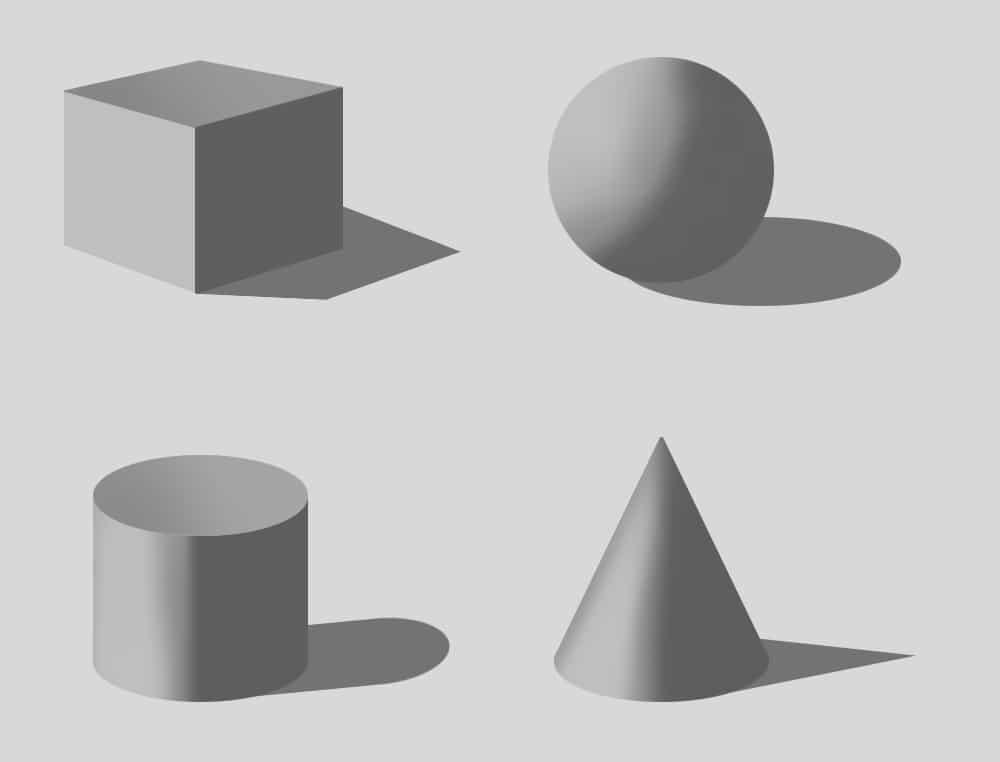
This step really serves to round out the form. Be careful to maintain a strict separation of values, though. Because of its location on the shadow side, the new value introduced as reflected light must be darker than the darkest value of the light side. Notice how the reflected light illuminates part of the shadow side, but a band of shadow remains along the terminator. This is called the core shadow, and it’s the darkest part of our shadow side. It remains visible because the light coming from our main source is stronger than the reflected light. If we were to use 2 equally powered light sources, the core shadow would disappear. For our last step, we’ll add highlights.
These serve a similar role as the reflected light and really help to make the forms feel solid. Notice how the strong highlight on the cylinder causes it to feel metallic, while the matte highlight of the sphere makes it feel softer, like a sort of rubber.
We’ll further explore how lighting is used to communicate materials in the future. For the time being, practice rendering these basic forms in different light scenarios. Once you’ve got a solid command over these, you’ll be able to render anything.

Taylor is the Managing Editor of Notes on Design. Taylor is a graphic designer, illustrator, and Design Lead at Weirdsleep.


NoD Newsletter
Enhance your inbox with our weekly newsletter.